Frozen dinner rolls are one of those quiet kitchen shortcuts that most people recognize immediately. Small portions of yeast dough, already shaped and waiting in the freezer until dinner needs something warm beside it. They are often sold simply as frozen dinner rolls, though some packages call them frozen yeast rolls or bake-and-serve rolls, and the idea behind them is straightforward—fresh-baked bread without starting the dough from scratch.
Getting frozen dinner rolls to rise properly before baking can be tricky. If you bake them too soon, they may turn out dense or pale. This guide shows you how to get them right.
Before You Start, Check the Clock
With frozen dinner rolls, the clock is only a guide. Timing can change with room temperature, roll size, how cold the dough is, and the type of dough. Even small temperature changes can affect how quickly yeast dough develops, making dough temperature useful to consider when timing varies.
| Stage | Approximate Time |
| Thawing | 1–2 hours |
| Rising | 2–4 hours |
| Oven preheating | 10–15 minutes |
| Baking | 15–20 minutes |
| Resting before serving | 5 minutes |
These are practical estimates rather than fixed rules. When you prep or cook, you may take more or less time than the table suggests because your kitchen, dough, oven and preferred finish can all change the timing. If the package gives different instructions, use those as your starting point.
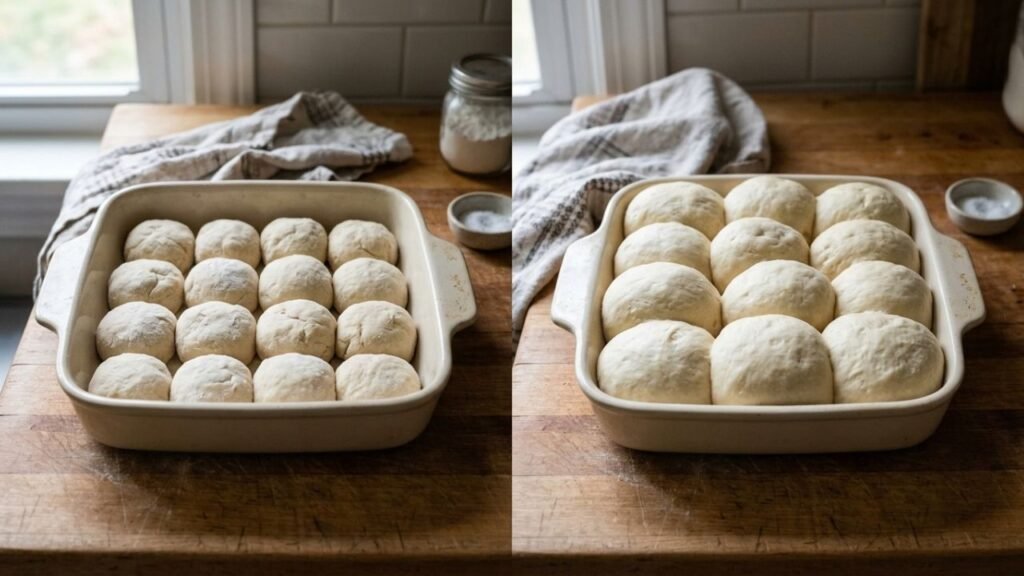
The most important visual clue is the dough itself. For frozen rolls that need to rise, you generally want them noticeably puffy and close to doubled in size before they go into the oven. A timer can tell you how long they have been sitting there; it cannot tell you exactly how quickly your dough has developed.
What You Actually Need
The ingredient list is deliberately short because frozen dinner rolls already contain most of what makes them work.
- Frozen dinner rolls — 8 to 12 rolls
- Butter — 2 tablespoons, melted
- Optional: a little extra butter for brushing after baking
- Optional: flaky salt, sesame seeds, poppy seeds, garlic butter, or chopped herbs for finishing
If your rolls are already seasoned or coated, you may not need anything beyond the rolls themselves.
Simple Replacements for Less Common Additions
| Ingredient | Easy replacement |
| Butter | Olive oil or melted plant-based butter |
| Flaky salt | Regular fine salt, used sparingly |
| Fresh herbs | Dried herbs |
| Sesame seeds | Poppy seeds or leave them out |
| Garlic butter | Plain melted butter |
These replacements are mainly about flavor and finishing rather than changing how the rolls bake.
Give the Rolls Room to Become Rolls
Remove the frozen rolls from their packaging and arrange them in a lightly greased baking dish or on a lined baking sheet, leaving some space between them. They will need that space as they expand.
Cover them loosely and leave them somewhere reasonably warm until they become soft and visibly puffy. Depending on the product, this can take several hours. Don’t be tempted to bake them simply because they have thawed; thawed and risen are two different stages.
If your kitchen is cold, expect the process to take longer. If the room is warm, the dough may move faster. Keep an eye on the size and texture rather than treating the suggested time as a deadline.
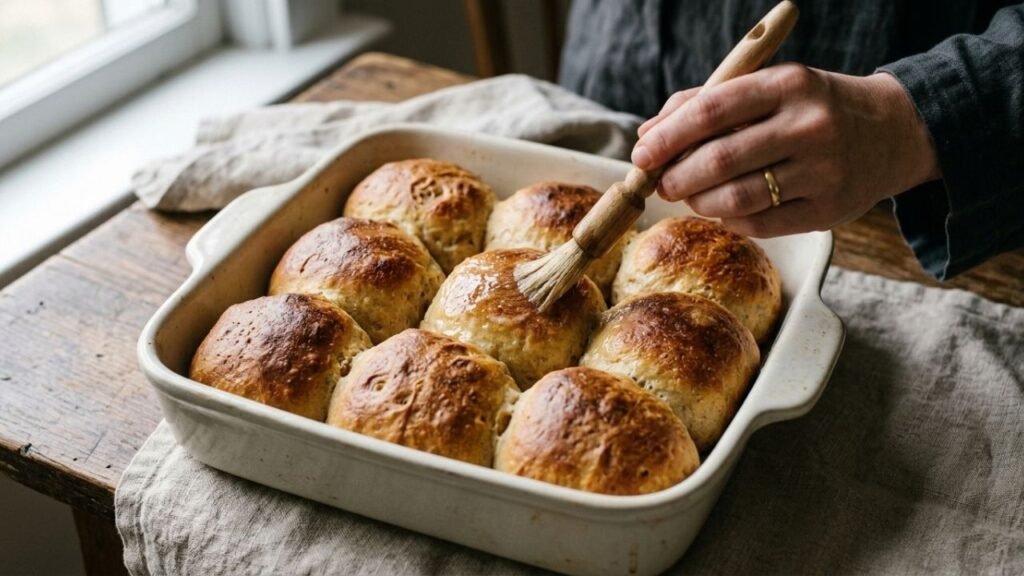
Once the rolls have risen, heat the oven to about 350°F (175°C). Brush the tops lightly with melted butter if you want a softer, richer crust.
Place the rolls in the preheated oven and bake until the tops are golden and the centers are cooked through, usually around 15–20 minutes for standard-sized rolls. Smaller rolls may finish sooner, while larger or closely packed rolls can need longer.
If the tops are browning quickly but the centers still seem underdone, loosely cover the rolls with foil for the remaining baking time.
Let them sit for about five minutes after coming out of the oven. That short pause gives the crumb time to settle, while the rolls are still warm enough to bring straight to the table.
The Last Five Minutes Matter More Than They Look
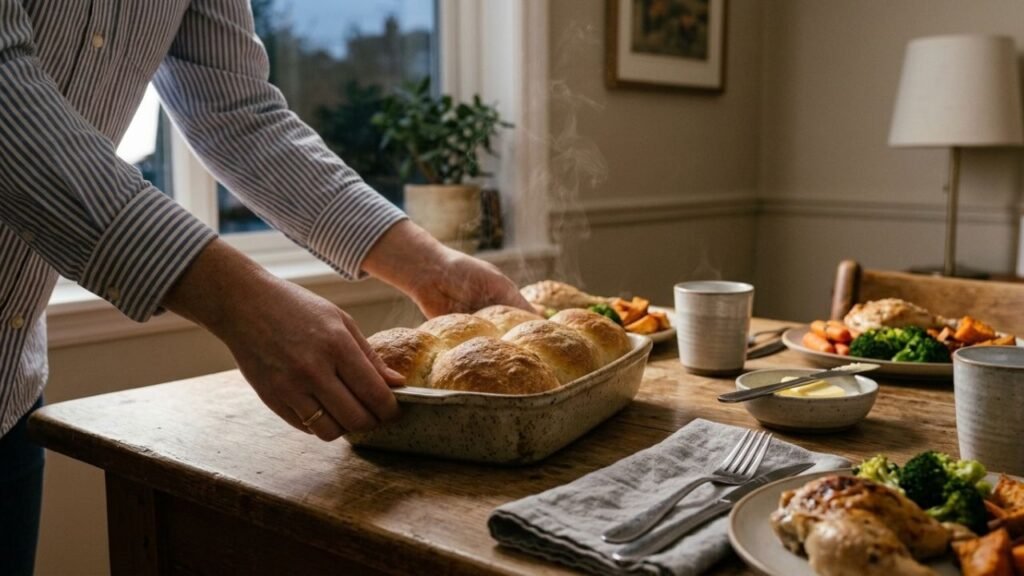
Dinner rolls are at their most useful when they arrive warm, not when they simply arrive. Serve them in the baking dish for a casual table, or transfer them to a bread basket lined with a clean cloth if you’re serving a larger meal. A final brush of butter gives the surface a softer finish and adds a little richness without overwhelming the bread.
For a holiday dinner, roasted vegetables, soup or a roast, plain buttered rolls are often enough. If the rest of the meal is relatively simple, garlic butter, herbs or a little flaky salt can make the same rolls feel more deliberate.
The useful trick is restraint. The roll should still taste like bread.
Can You Store the Leftovers?
Yes, if you have leftovers, let them cool and place them in an airtight container or sealed bag. They are generally best eaten within 2–3 days, although how long you keep them is ultimately up to you and depends on how well they are sealed and how you store them.
For longer storage, freezing the baked rolls is usually more practical than leaving them at room temperature for an extended period.
To reheat, warm them gently until heated through. A short period in a moderate oven usually gives the outside a better texture than prolonged heating, which can dry the bread.
Again, the suggested storage or reheating time is a guide, not a guarantee. How long you keep or reheat them depends on your storage conditions, the size of the rolls and the texture you prefer.
The Small Mistakes That Change the Result
Baking before they rise
This is probably the biggest problem with frozen yeast dough. Thawed dough is not necessarily ready dough. If the rolls still look small and dense, give them more time.
Letting them rise too far
The opposite problem can happen too. Dough that becomes extremely puffy and fragile may have gone beyond its ideal proofing point. The rolls can collapse or bake with a weaker structure.
Putting them in a cold oven
Starting in a cold oven changes the baking environment and makes the expected cooking time less reliable. Give the oven time to reach temperature first.
Packing the pan too tightly
Rolls expand as they rise and bake. If they begin almost touching, that’s not automatically wrong, but overcrowding can make it harder for heat to circulate and can leave the sides softer than the tops.
Judging them only by color
A golden surface is useful, but it isn’t the only sign that the rolls are finished. Very dark tops can still hide underbaked interiors.
Adding too much butter
Butter is a finish, not a rescue strategy. A light coating is enough. Soaking the rolls can make the surface greasy and mask the bread’s natural texture.
A Few Details That Make a Difference
1. Can I cook frozen dinner rolls without thawing them?
Only if the particular product is designed for baking directly from frozen. Frozen dough that requires proofing should be thawed and allowed to rise first.
2. How do I know when frozen rolls are ready to bake?
Look for a substantial increase in size and a soft, puffy appearance. For many yeast rolls, roughly doubling in size is a useful guide.
3. Why are my frozen dinner rolls dense?
The most common reason is insufficient rising time, although old or poorly stored frozen dough can also lose some of its ability to expand.
4. Can I prepare frozen rolls the night before?
Some frozen dough products can be thawed in the refrigerator overnight, but the exact instructions depend on the product. Check its packaging before planning an overnight rise.
5. Why did my rolls brown before the inside was done?
The oven may be running hot, the rolls may be positioned too close to the heating element, or the tops may simply need protection while the centers finish baking.
From Freezer to Table
The appeal of frozen dinner rolls isn’t that they eliminate time. They simply move most of the work somewhere else. The important part, once the rolls are in your kitchen, is knowing which stage they are in. Frozen, thawed and properly risen are not interchangeable states, and recognizing that difference is what separates a soft, airy dinner roll from one that arrives at the table looking finished but eating heavy.
Give the dough time when it needs time, use the oven as the final stage rather than the entire process, and judge the rolls by what they look and feel like—not by the clock alone. That’s usually enough to make the freezer shortcut feel much less like a shortcut and much more like a well-timed piece of kitchen planning.